You may utilize a wireless motion sensor alarm around your home to notify you of burglars, animals, guests, or any other movements on your property by following the instructions in this video tutorial. The sensors are powered by 120-volt outlets.

The field of vision for the sensor will vary depending on the sensors you choose. Compared to other models, some can be more accurate and have a wider field of view. This is a fantastic, affordable, and low-cost approach to safeguarding your home.
Hardware Required
- wire strippers/cutters
- drill -drill bits
- screwdriver
- soldering iron
- motion sensor
- 120v exterior/outdoor wire with plug
- waterproof electrical box big enough for the relay, wires, and door bell switch
- wireless door bell
- marrette connectors
- low voltage wire
- 120v mechanical relay
- solder
Step 1: Getting Started

You will need to drill a certain number of holes into the waterproof electrical box, depending on how many sensors you have purchased. Drill the holes to the size necessary for the electrical exterior/outdoor wire and sensors.
Step 2: Working With the Wireless Door Bell


Disassemble the wireless door bell button to locate the switch on the circuit board and identify the wires that activate the alarm. In order to determine which connections the wire has to be soldered to, test this switch using a multimeter if necessary. The low voltage wire should be soldered in the correct place. Check that the doorbell works by crossing the two wires you just connected, then reassemble the doorbell switch.
Step 3: Assembly
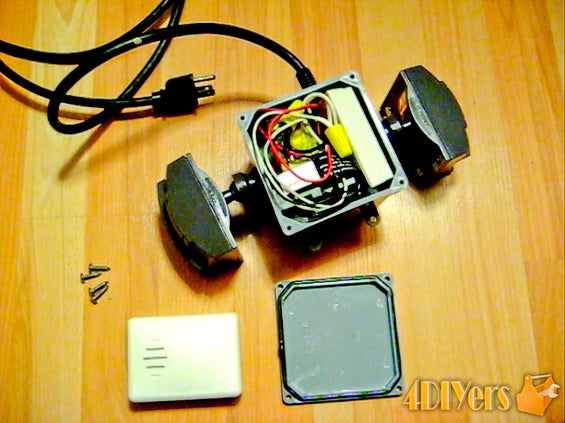

To make electrical connections, strip exterior/outdoor and motion sensor wires appropriately. On the switching side, connect the doorbell’s wires to the relay. Install motion sensors, exterior/outdoor wire, and a waterproof box. Using marrette connectors, connect the motion sensor power wires to the exterior/outdoor wire’s power wires.
Connect the common wires from the outdoor/exterior wire to the common wires of the motion sensor along with a spare wire that will travel to the relay. Switching wire and additional common wire should be connected to the coil side of the relay. Put everything in the box at this point, test the device, then mount the box wherever you wish.
Step 4: Wiring Diagram

Hope you all find this article informative. Superkitz will be back soon with more interesting blogs.
